Note: I wrote about Shield Cat's color blending techniques ages ago on Patreon. However, that information is pretty much out of date, as so much has changed since then, so don't worry - you won't be reading the same thing all over again.
Dark and Gloomy? Think Again
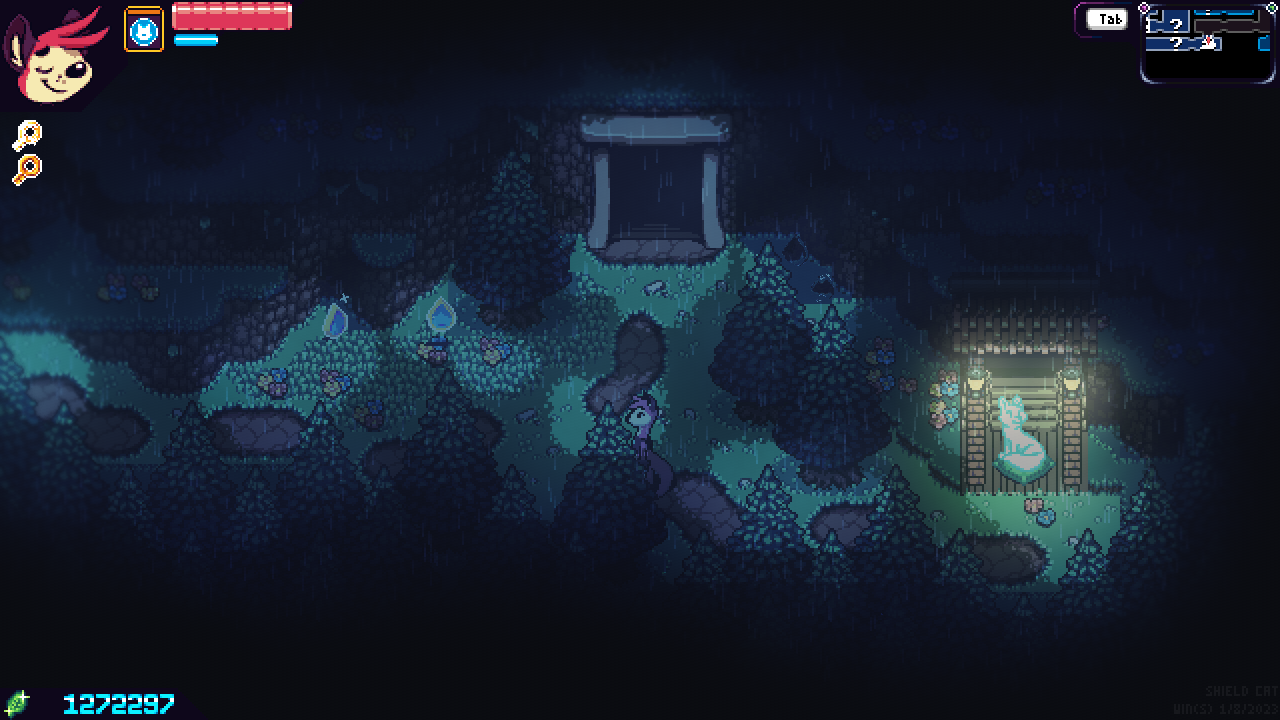
Here's a spot in the southern part of the Forest Path. In this stage, it's dark and gloomy, with a bit of mist and rain. However, take off all the special effects, and...
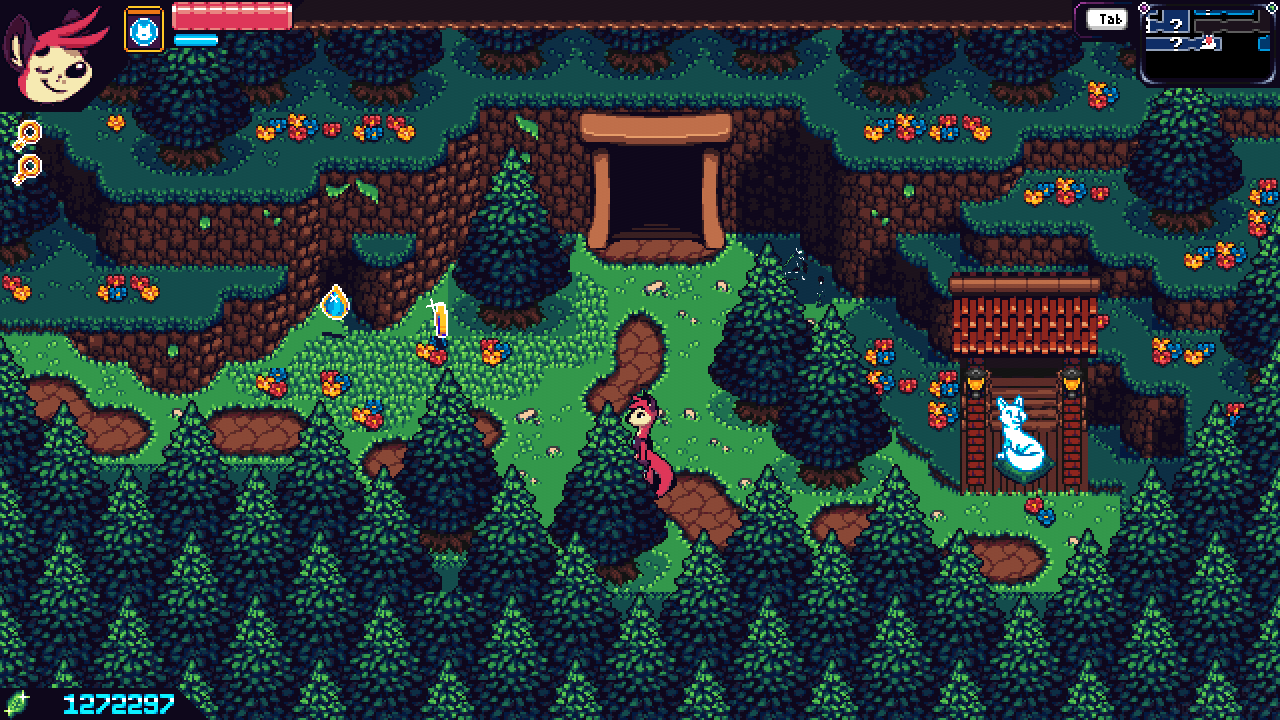
That's not dark and gloomy at all! In fact, it looks like something you'd see on the River Path or some other outdoor, sunny area. So, what's going on?
Setting The Mood
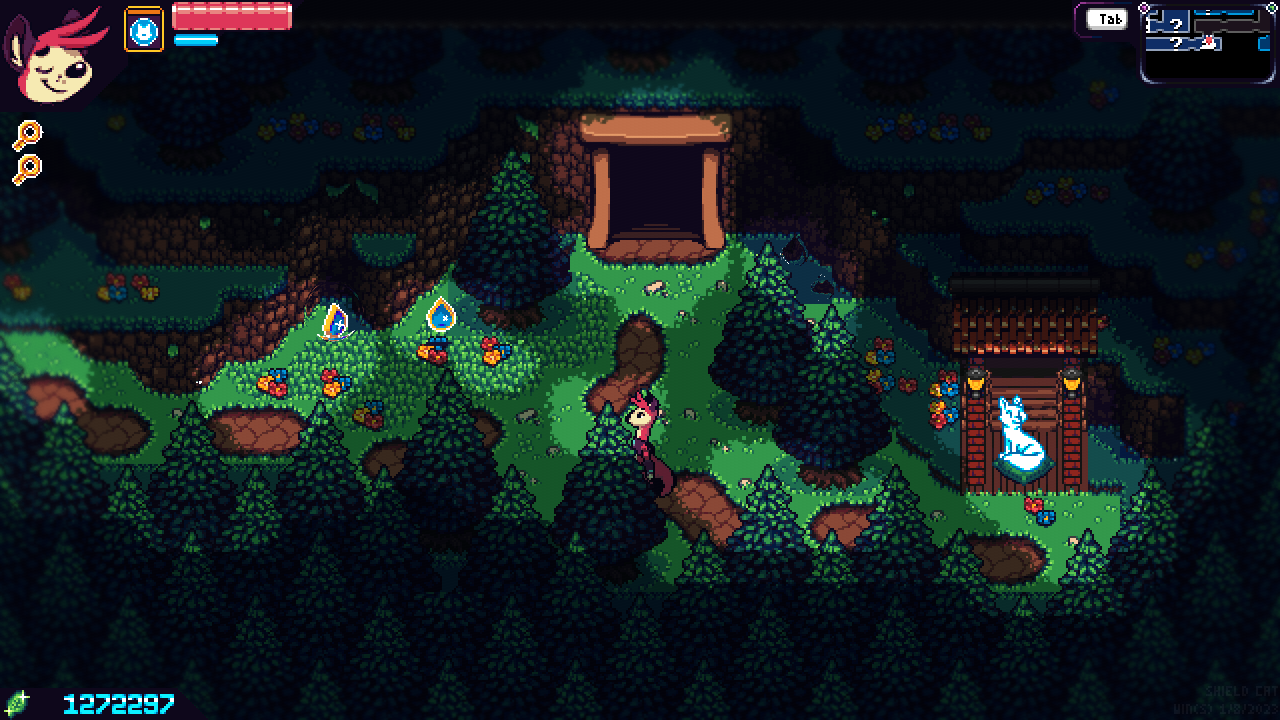
With this scene, it starts with the forest overlay. Many of the deeper forest screens have two layers of leaves overlaid to give the sense of light peeking through the treetops. These two layers blend together to create the shadows you see on the ground.
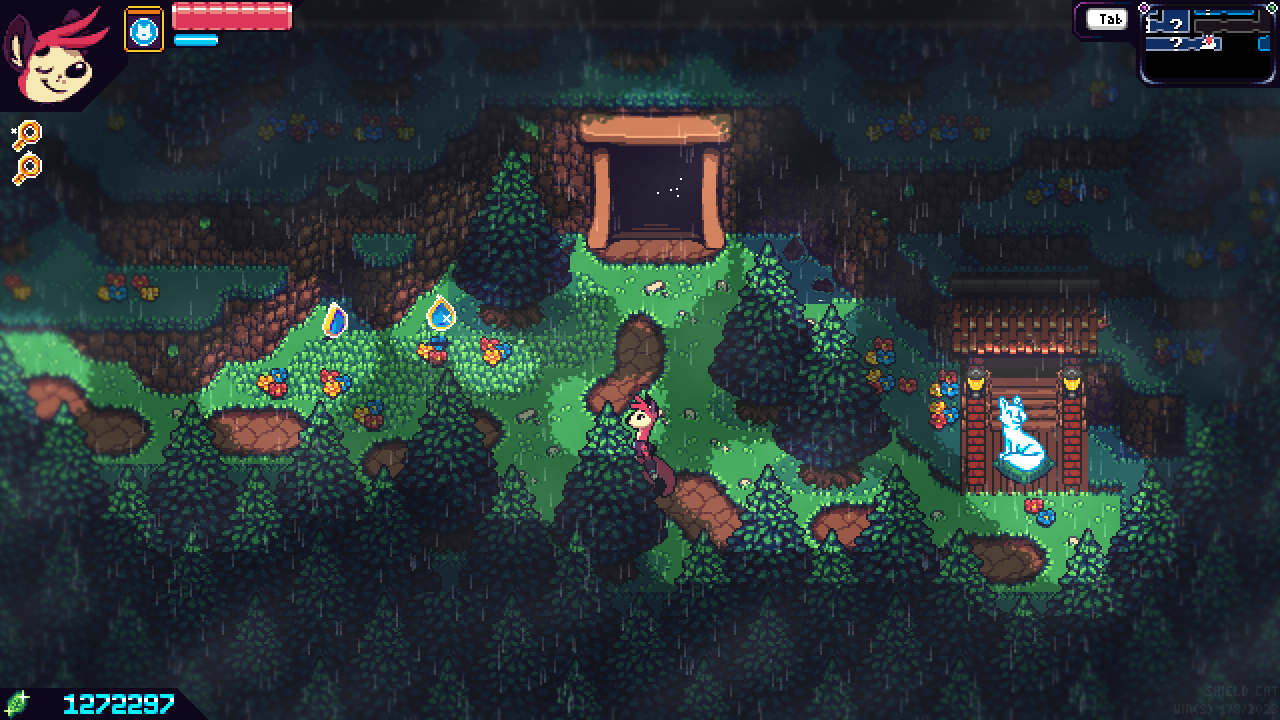
Since this is a rainy stage, we can now add the mist and rain. These, as well as the tree canopy, use blend modes to overlay themselves in the stage. Shield Cat avoids true alpha blending wherever it can to have the best performance possible - it usually only shows up in very specific circumstances, like antialiasing on text.
The Color Modifiers
The next step is to use screen-wide modifiers to change how the scene looks. There are options for multiplicative blending and overlay blending, as well as adjusting the hue, saturation, and value of the scene. There can also be a "base" color that lies underneath everything else, and we can control how much of that color shows through vs. the stage color (this is how dark or foggy scenes work, while cutting a "hole" in the graphics for the player to see - more on that later.)
With a little bit of work, we can make this scene look like something you'd find in the Autumn Grove.
The "Gradient Overlay"
While the method by which this works has evolved over time, it still keeps its original dev name as the gradient overlay. This overlay applies "Overlay Blend Mode" effects on the scene, and further enhances how it looks.
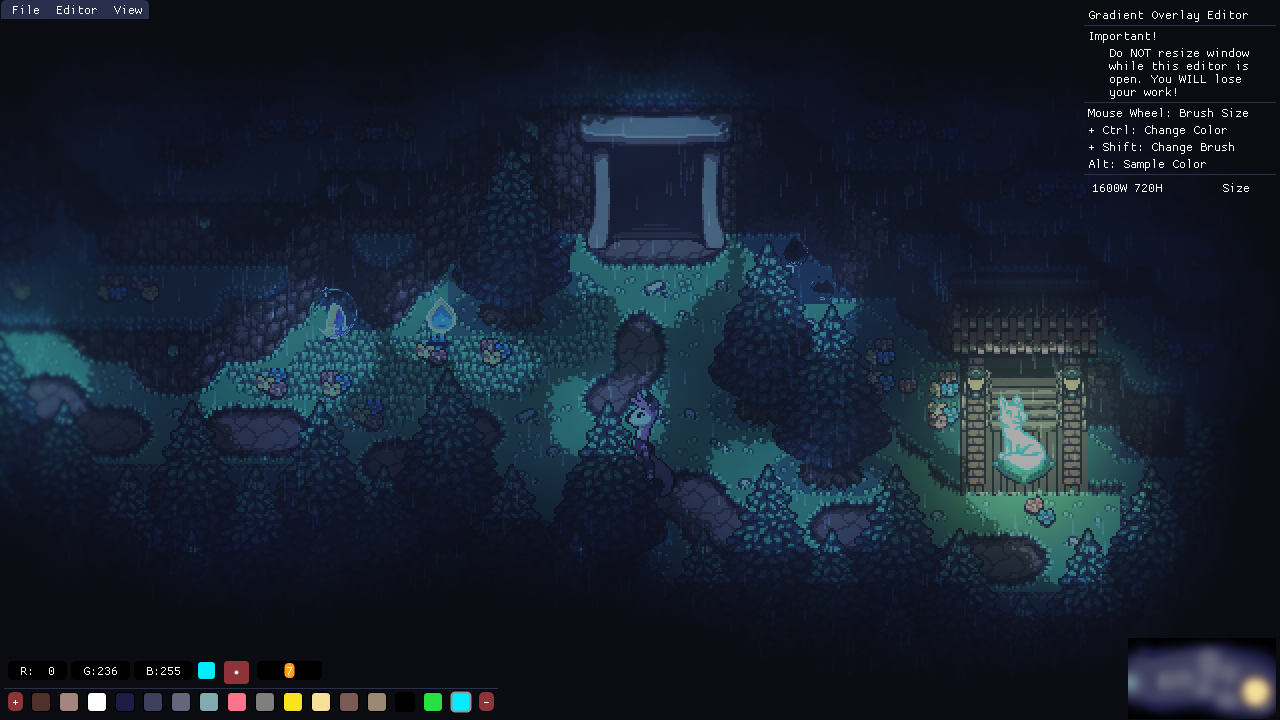
The Gradient Overlay is essentially a chunk of a small texture that is stretched over the entire screen using bilinear interpolation to smooth it out. This allows adding shadows to the edge of the screen, as well as additional glow where the light shows through the tree tops. Also, this provides some of the additional glow for the lights around Willow in this scene.
The Overlay Editor is a custom editor I wrote myself, and allows me to draw directly on the screen and see in real time how it'll look in the game. This is the third iteration of it, which a higher resolution and much easier to work with tools. (The original overlay was much lower resolution, and required modifying the image with external tools and then refreshing to see how it looked in the game. It was very time consuming.)
I should note, some external editing is still done on the overlay texture, mainly for blurring and smoothing it out. Usually my process is, lay down the colors, smooth them out externally, and then reload within the game to see how it looks.
The "Alpha Overlay"
Despite its name, this overlay does not use alpha blending. It used to, however, I realized I got the same results by just using additive blending.
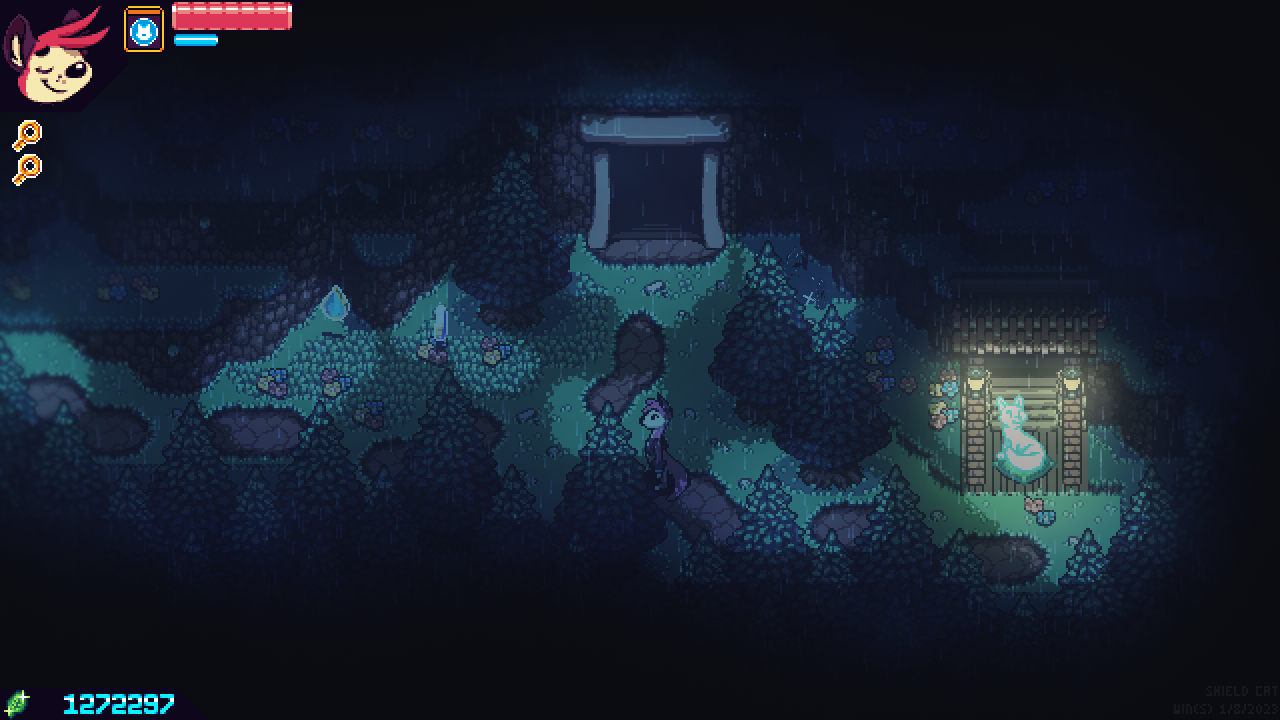
This overlay doesn't do much in this particular scene, but it does provide a little bit of glow for the lanterns by Willow.
Here's a screen from the Lignum Woods that better demonstrates what this overlay does. Here, it provides the extra glow seen on the mushrooms. Like the Gradient Overlay, this one also has a real time editor.
The Lighting Overlay
This one's gonna be tricky to demonstrate, but I'll do my best. Since this overlay isn't really used in the Forest Path scene above, we've got to move to the Abandoned Mines.
This overlay essentially cuts a "hole" in the scene and dictates where the stage will be "lit up." Lance's "Lantern" passive is disabled here, so you can really see how strong the shadows are.
Here you can see the lighting overlay in action, as well as how Lance's self-lighting interacts with it. This effect can also be used for foggy scenes, and will be used later for the thick, snowy areas of Mt. Bophades.
Putting It All Together
All of these various effects work together to make each screen feel unique, despite the limited amount of tilesets that are actually in the game. The color blending, as well as the gradient, alpha, and lighting overlays are all applied in a single pass. This allows even greater control over the lighting, as well as making it faster, since all of the textures involved are applied in one go.
Those overlays used to be applied in a separate pass, separately. However, they're now applied at the same time. The rain and fog effects, however, are still applied separately.
Comparing To The Past
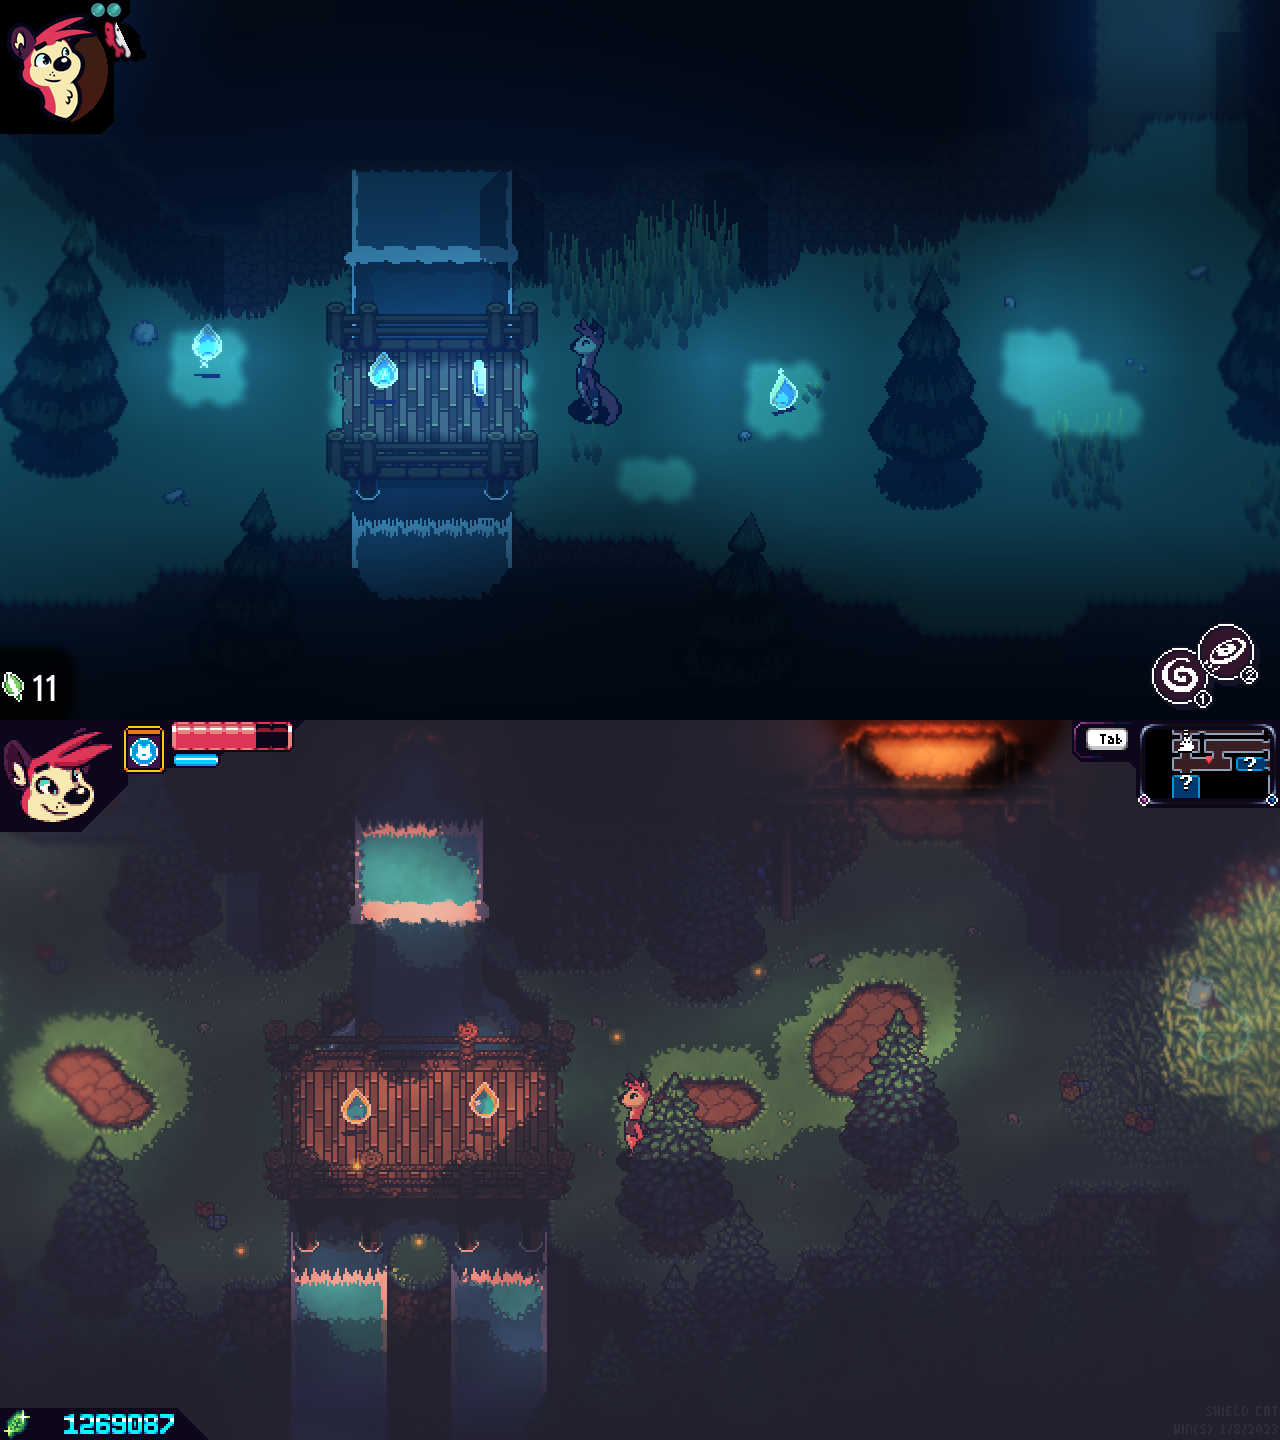
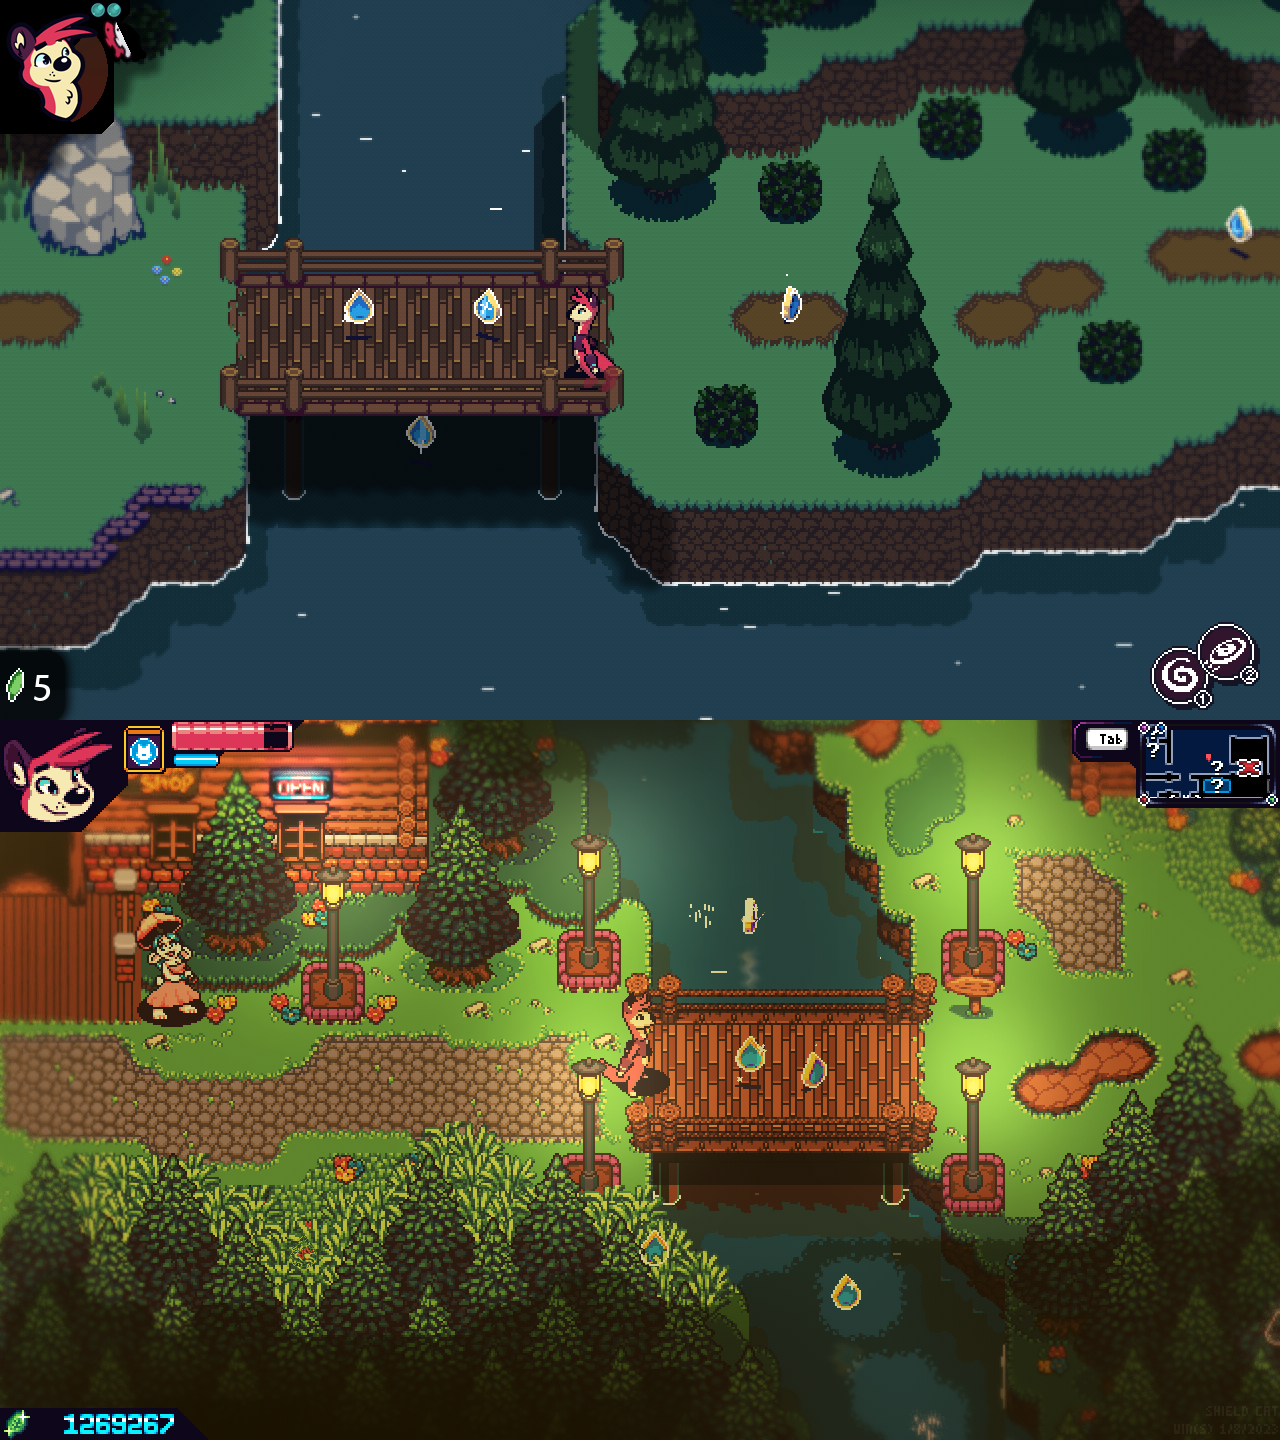
Here are some comparisons between the SAGE 2020 demo and the Chapter 1 demo from January 2023. This idea of color blending was present even way back then, but the application of it was a lot simpler. Nowadays, very complicated effects can be done with ease in very little time.
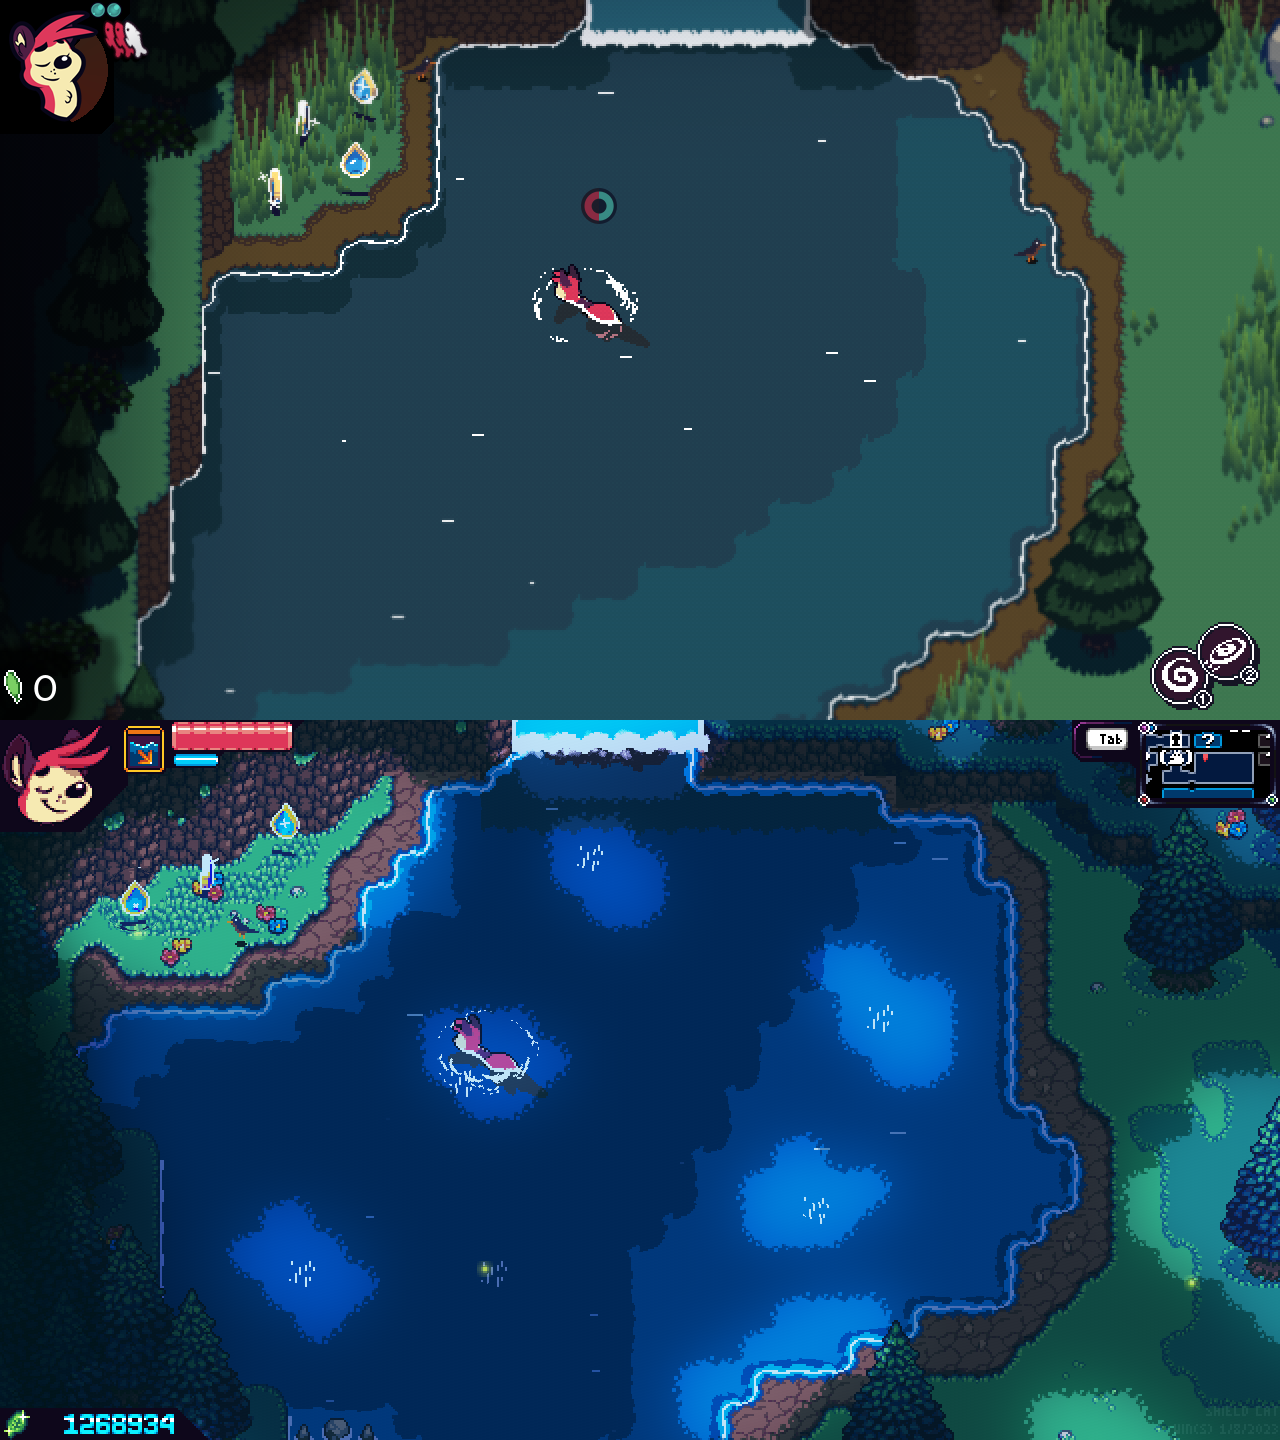
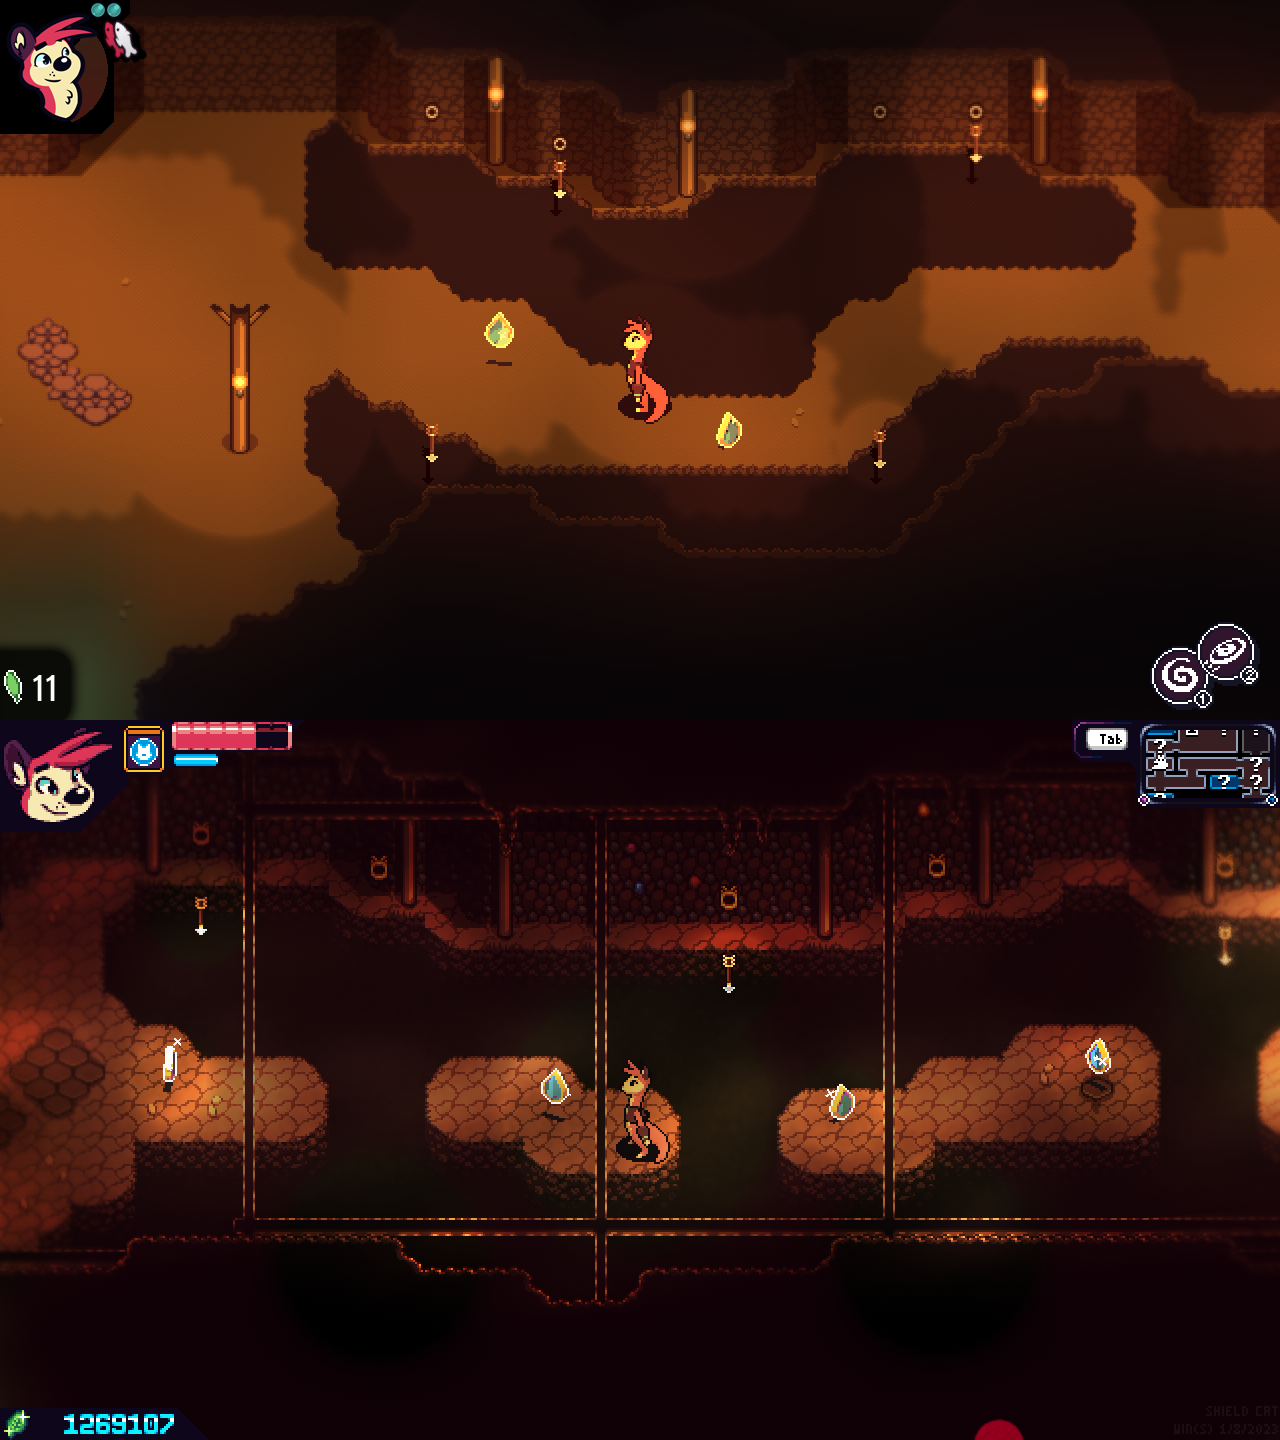
What About Puzzle Elements? Other Glowy Stuff?
You may be wondering about screens like this. Do they use the lighting overlays? The answer is that no, they do not. Instead, these have their own separate effect layers that are applied whenever you're on the same screen as them. For these light beams in particular, the game uses an animated tilemap for the light beam, and then re-draws the tilemap to a very, very low resolution surface. This surface is then drawn back to the screen additively, allowing for the extra glow you see. However, it can't be aware of where the light is blocked, which is why you'll sometimes see the light beams peeking out from under the ground where they're otherwise not visible. I try my best to hide this whenever I can.
Try It Yourself, If You Dare
This part is for people who want to mess with the game. If you're just here to admire the pretty graphics, you can stop reading now. Or don't, I can't control how you engage with this page.
Did you know that all of Shield Cat's built-in editors are available to the end user? It's true! However, you have to jump through some hoops to make it work.
Warning: This next part will allow you to completely damage your installation of the game, and possibly irreversibly mess up your save file. The developer (that's me) assumes no responsibility for loss of data, and you do everything here at your own risk. I will also offer no support for these tools. Make a backup of your save files first, and if you do screw up your installation, reinstalling the game should fix it.
First, you'll have to press F10 to open the Debug Panel. Then, go down to "Misc" and toggle "Allow Debug Mode." This will allow you to toggle the visibility of various layers and graphical effects by using the "Layers" subpanel on the left, as well as the "Game" submenu at the top.
If you're curious what the graphics for the overlays looks like, you can find them in the installation folder, under data/overlays data/alphas and data/lights. These folders contain all the overlays used by the game in PNG format.
However, you can take it a step further.
Doing the above on its own wont edit anything - it simply provides you a toggle you can use in game. It's also the easiest way to see how this all works for yourself.
To enable the in-game editors, you'll have to create a symlink in the game's save data folder that links to where it's installed on your hard drive. Shield Cat's save data is stored in %localappdata%/Shield_Cat, but where it's installed will depend on if you got it from Itch or Steam. The method by which to create a symlink to the installation folder is beyond the scope of this blog post. Essentially though, you're creating a link between the save folder and the installation folder that looks like this. The purpose of this is to bypass Gamemaker's sandboxing. On my own computer, it points to the project directory, and this is how I edit the game using my own tools.
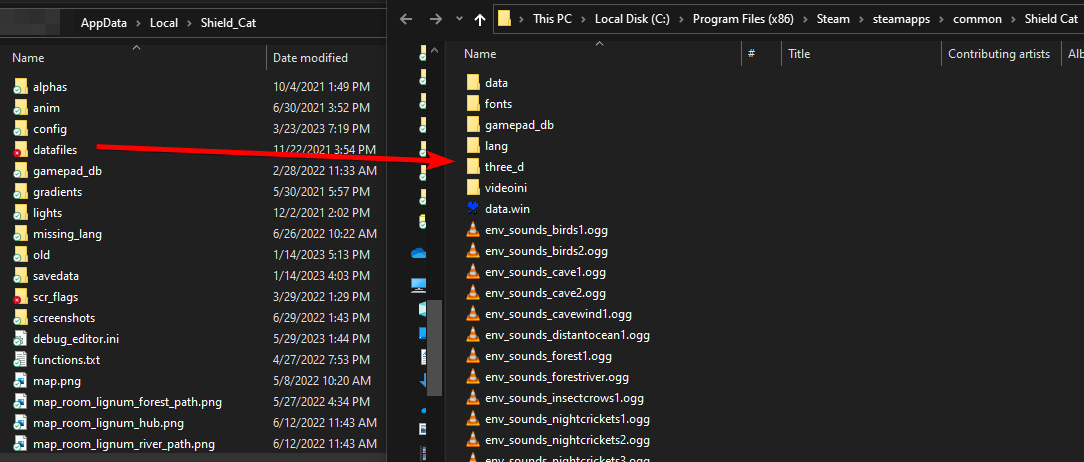
If you've done it right, the Editors menu will show up in the debug panel.
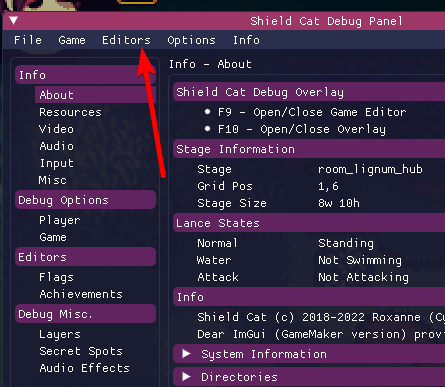
Have fun trying it out! Just know that there are some bugs, since these editors are only meant to be used by me. I won't accept or fix bugs related to the use of these editors.
Shield Cat has a lot of self-modifying code besides just these editors, for example, to update where collectibles are or how many are in a stage. It is recommended that, once you're done messing around, you disable the editors again. You can do this simply by renaming the datafiles folder to datafiles2 or something - essentially, something the game wont be looking for. If you leave all this enabled between updates, there's a high chance you can actually damage your save file.